Well one of them at least...
And I would be talking about my moms Crackle Top PB Cookie... see I told you I would post it... I just took my sweet time... lol
This is one that I remember my mom baking for us for all the bake sales at the school... or just for a sweet treat at home... always a favourite in our house, alongside the shortbread recipe...
Crackle Top Peanut Butter Cookies
[If you have a food allergy to pb, obviously dont make this...]
3/4c peanut butter
3/4c margarine
3/4c sugar
3/4c brown sugar
1 large egg, slightly beaten
1t vanilla
1 3/4c flour
1/2t baking soda
1/2t salt
granulated sugar
Cream together marg, and sugars, blend in the egg, vanilla as well as the peanut butter. Sift in the flour, salt and baking soda, mixing well to incorporate the batter into a stiff dough.
Wrap the dough in plastic and chill in the fridge for 20-30m.
Using a dessert spoon, form small balls of dough, and roll them in the granulated sugar you have set aside. Place this on an ungreased cookie sheet about 1/2 - 1 inch apart to keep from becoming one large cookie.
Bake at 375 deg for about 10-12 mins, you are looking for the edges to brown up, and the little dough balls to fall into a more cookie like shape, with a crackle top.
Pull them out of the oven and let them cool/set [they will fall apart into a molten hot pile of pb goo if you try to eat one before they are cool enough...]
Yields about 24-48 cookies [yeah large gap there, it really is based on how large you roll out the dough balls]
Wednesday, March 23, 2011
Wednesday, March 9, 2011
It was my birthday I will post what I want to!
Ha Ha
Well it was my birthday back on the 2nd of March [last Wednesday] and while I was going to put in a recipe for my Crackle Top PB Cookies, I am going to put those on the back burner right now and post up my birthday menu from this past weekend.
For my birthday menu I had some friends over and made a really tasty pulled pork, with a Nearly Nicoise Salad, some Pork Dumplings [see Potsticker Recipe].
So here is my recipe for Pulled Pork.
First is choosing the perfect hunk of meat, I use a nice Shoulder or butt with skin intact. I also head to my favourite butcher who knows the best cuts of meat. You will want to avoid loins or lean meats as it will not allow for shredding when it is all done. And aim for about 1/2lb of meat per person to insure there is enough.
For this I used a 6lb Pork Shoulder with skin on.
Ingredients
Pork Shoulder
1c brown sugar
garlic powder
salt
pepper
cayenne pepper or smoked paprika
ketchup
white vinegar
hot sauce
water
butter
honey
Now the how to...
Take that lovely piece of meat, and pat it completely dry with paper towels. Using a sharp knife, cut the skin on a diagonal [making a diamond pattern].
In a separate bowl [or using a ziplock bag] mix together the dry spices to create a spicy and sweet BBQ rub. The base is brown sugar, taste after you mix it all together testing for the right spice mixture. I use very little salt [about 2T and 4T of fresh cracked pepper].
Using about half the spice mix, rub it into the pork, massaging the spice into the meat. Stick this into your slow cooker skin side down and turn it on high with about 1/4c of water to keep from sticking. Cover and let cook for the next 2 hours.
While this is happening I mix up my wet sauce, into a pot I drop the remaining dry rub, about 1/2c ketchup, 1/4c white vinegar, 2T hot sauce [or more depending on personal taste], 4T liquid honey, and about 2T or butter [which gives the sauce a glossy finish]. I bring this mixture to a nice boil, adding any liquid from the slowcooker to the sauce to thin it out and help develop its flavour.
At 2 hour mark I add in half of my wet sauce to the slow cooker, mixing everything together, leave it on low for the next 12-24 hours. after all the time, I will pull apart the pork shredding it with two forks. pulling out any bones and the fatty skin [while eatable, I personally pull it out]. at this point I will also add in the rest of the sauce and stir it in to combine.
Serve it on a kaiser roll or bun of choice.... its delicious!
Nearly Nicoise Salad
~serves 8
Need;
1 can Chick peas, drained
1 med Cucumber, diced
1 pint Cherry Tomatoes, halved
3 Avocadoes, diced
1 Red Pepper, diced
½ Green Pepper, diced
2 Carrots, shredded
2 c Corn Kernels
6 Eggs, hard boiled and diced
Dressing;
Juice of 3 Lemons [approximately ¼ c]
Lemon zest
1/3 head of fresh Dill, finely chopped
½ c Olive Oil
Cracked Pepper
½ hoof crushed Garlic
Toss together the vegetables in a large salad bowl [I like to use my hands to keep the avocado from becoming mushy]. In a separate bowl or measuring cup whisk together lemon juice, zest, dill, pepper and garlic. While mixing, pour oil in a steady stream using approximately ½ c of olive oil [I use extra virgin for a smoother and lighter taste]. You want to have the dressing come together to create a creamy looking emulsion. Pour dressing over salad and toss once more to ensure to incorporate dressing throughout the layers.
Some optional ideas;
To make it closer to an actual Nicoise salad, add in black olives, pitted and halved along with 1 can tuna, drained.
Can use other herbs such as Parsley, Coriander or Chives for different flavour combinations.
Thursday, February 24, 2011
Cookies by request!
I was asked last night to share cookie recipes, so here is one of my favourites [Pictures will be added at a later time]
Shortbread Cookies
4c flour
2c icing sugar
1lb butter [softened]
1T Vanilla
Cream together butter and icing sugar and vanilla. Fold in flour one cup at a time until you get a stiff dough. Turn out dough into a cookie tray and flatten using your hands to a sheet of dough.
You are looking for 1/2 inch thickness for a crisp cookie, or 1inch for a soft dense cookie.
Bake it at 350deg until the edges start to brown lightly.
Cut the cookies after allowing the tray to cool.
They can be placed in the freezer for later snacking! [That is if you dont eat it all up!]
Next time...
Crackle Top PB Cookies....
Tuesday, February 1, 2011
Chinese New Year 2

To continue into my lunar new year celebrations I want to share with you my recipe for Xiaolongbao or in English Soup Dumplings, more specifically Shanghai style.
I found this one on the net and it was my first time making them, of course making my own adjustments to my tastes. It was easy and the results were pure delish.
This is a heavy recipe as it takes up to two days to complete with each of the three components, Soup jelly, ground mixture and dough. But don't be daunted! There are a few short cuts for these and I will share them for the starter cook!
*NOTE*
This is a freezable recipe! When made you can freeze it off on a cookie tray, and cook right from frozen.
Soup Dumplings, Shanghai Style [Xiaolongbao]
- 2 slices fresh ginger, bruised
- 2 garlic cloves, bruised
- 4 scallions, knotted
- 1 onion, quartered
- 3 L cold water
- 5 lbs chicken bones, necks, and feet if available
- Salt to taste
- 1 package (1 T) gelatin, softened in 2 T cold water
- 1L Chicken broth [reduced sodium]
- 1 can beef brovil [reduced sodium]
- Green onions
- shrimp shells
- Ginger, bruised
- Garlic cloves, bruised [skins and all]
- 1 pkg Gelatin softened in 2 T cold water
- 1 lb ground pork
- 8 - 10 oz shrimp, peeled, deveined, and chopped
- 1 t salt
- 2 slices ginger, minced [I grated the ginger in, about 1T, but do it to taste]
- 1½ t sesame oil
- 1 t soy sauce
- 1 T rice wine [Reg white wine is fine too]
- 1 egg, lightly beaten
- 3 t cornstarch
- ¼ t pepper
- 2½ c flour
- 1 t baking powder
- 1 t salt
- 4 eggs
- ½ c flour mixed with ½ c boiling water
- Cornstarch, for dusting
[note that with the dough, you may need more water or more flour based on how it feels as you mix it, use your instinct]
Shortcut:
- eggroll wrappers [small square size, cut into circles]
- flour paste to help glue together [1T flour mixed with 2T warm water]
Directions
Bring the seasonings, the water, and the chicken parts to a boil. Skim the surface as the stock simmers and cook the stock for 4 to 5 hours (there should be 1 to 2 cups of very rich chicken stock when done). Adjust the seasoning for salt. Bring 1 c of the stock to a boil in a saucepan, remove from the heat, and add the softened gelatin, while stirring. Allow the mixture to cool to room temperature, then pour the gelatin stock into a small square baking pan to chill. (The solidified gelatin will be cut into ¼-inch cubes.)

For the simplified version, brown off the shrimp casings and add in the seasonings and stocks. Bring it all to a boil and let simmer for 2 or so hours or until reduced to about 2c of liquid. Strain the stock and bring 1c to a boil. In a side dish dust the gelatin over cold water as per package instructions and add to boiling stock off the burner. Wisk together and pour into a baking pan [metal works best for cooling over glass ones, I used a cookie try for the Jelly]. Let cool to room temp before placing in fridge for solidifying [to do so beforehand risks spoiling of both the stock and other food in your fridge].
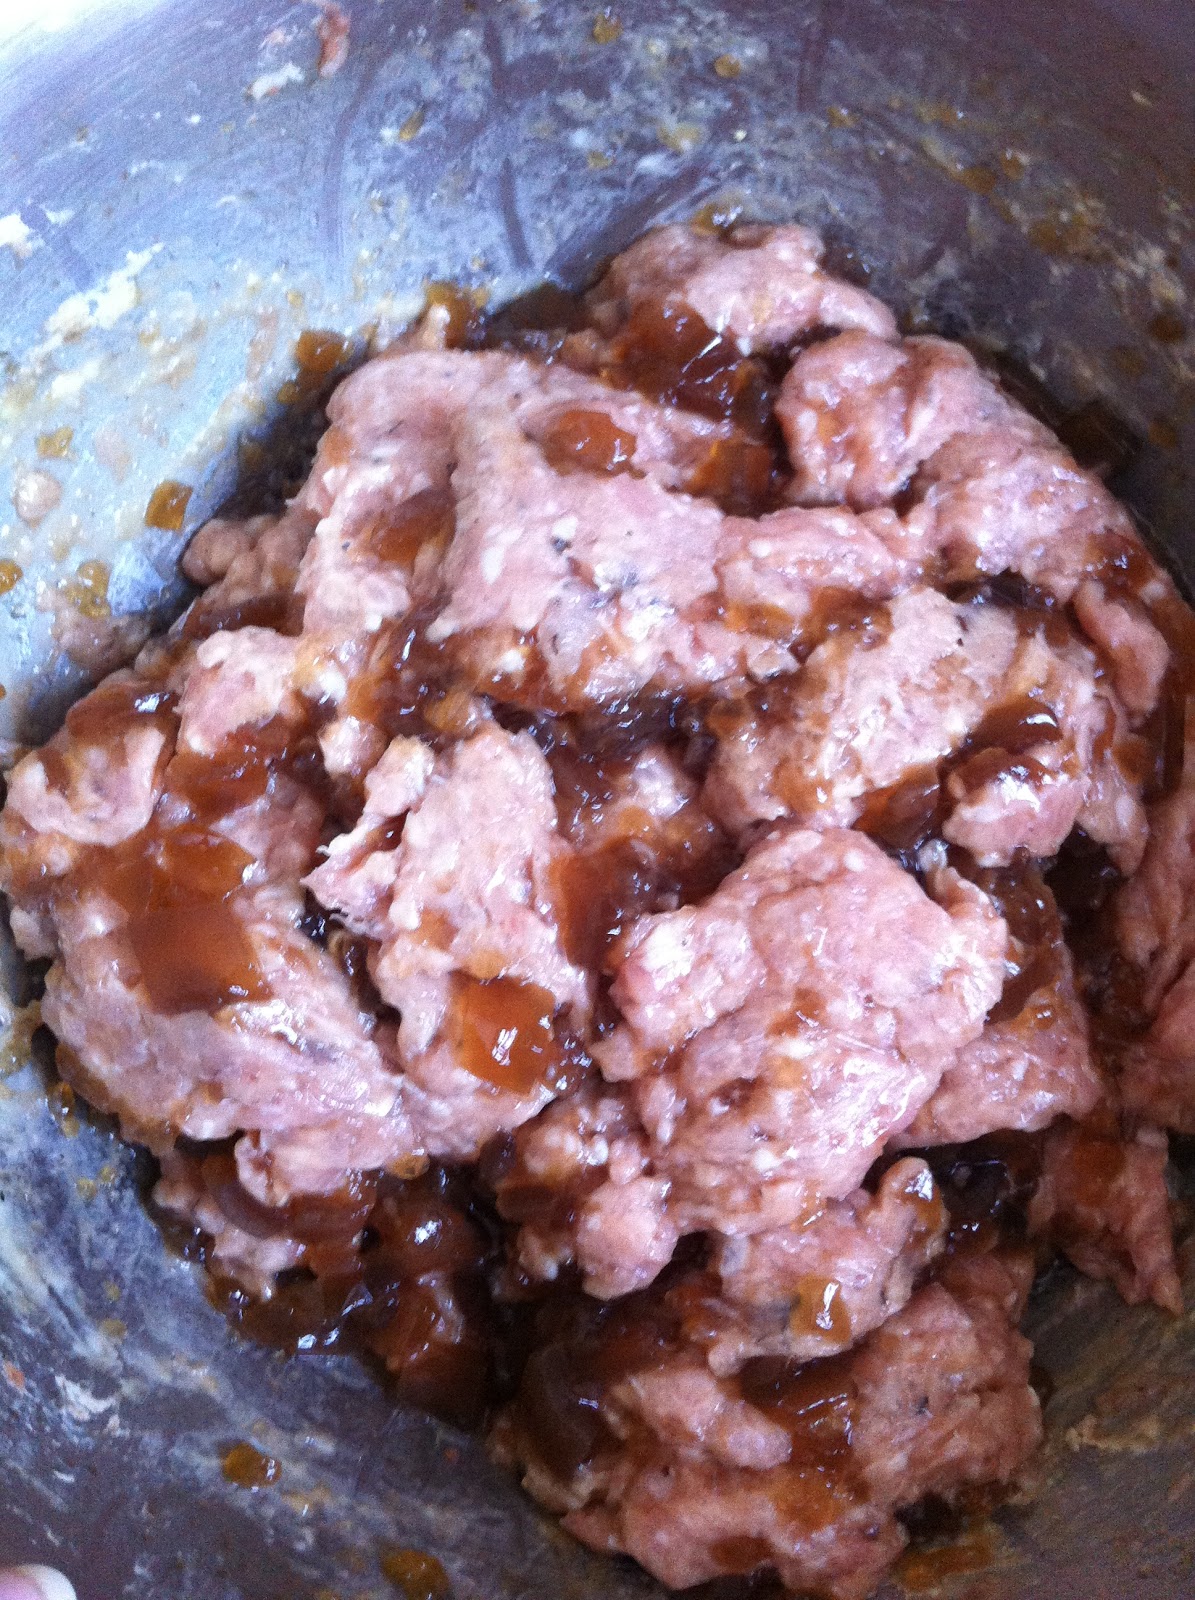
Combine all of the filling ingredients and mix well. Cut the gelatinized chicken stock into ¼-inch [6-mm] cubes. Stir the filling mixture and gently mix in the chicken stock cubes, quickly to prevent the gelatinized chicken stock from liquefying. Refrigerate at least 2 hours, preferably overnight.
Mix the flour, baking powder, and salt together. Stir in the eggs, one at a time. Make a well in the center, add the flour mixed with boiling water, and stir well to combine [at this time you might need more liquid of hot water or more flour, use your best judgement]. Knead the sticky dough into a smooth, elastic mass, dusting the work surface with flour as needed. Once the dough has become smooth, continue kneading for 10 minutes. Cover the dough with plastic film and allow it to rest for 1 to 2 hours, refrigerated.
 Divide the dough into 4 equal pieces. Roll each into a 10-inch cylinder, then divide each cylinder into 16 equal portions. Using a rolling pin, roll each of the 16 pieces into a 3-inch circle. If the dough starts to stick, dust the work surface with cornstarch as the dough is worked. Cover the circles as they are formed [note: do not fret, you don’t need a measuring tape out, the dough balls should be no bigger than the width of a loonie [or American half dollar] and when rolled out it shouldn’t be too much wider than that of your index finger, and not too thin for risk of tearing]
To form soup buns, fill the circles by placing 1½ T [or heaping dessert spoon] of the filling into the center of each round. Pleat the edges in a circular fashion and gather all the edges in the center, forming a purse. Leave a small hole in the center of the crimped pleats to allow steam to escape while cooking. Continue until all are filled, always keeping the dough and the finished dumplings covered with plastic film.
This is perhaps the scariest part when making the dumplings/buns. How I fold is this, holding the wrapper in your left hand place the filling in the centre [you want a rounded dessert spoon]. Fold up the cardinal directions and then pinch these. With the little open pockets pinch and twist them together and you get a pretty blossom twisted together. You want to have a good seal to prevent the soup part to spill out and over.
Note: If at anytime the jelly starts to loosen or melt just toss the mixture into the fridge, cover your wraps and let it chill for a half hour to an hour and go back at it. It is a pretty forgiving mix.
 Line a bamboo steamer with cabbage leaves or oiled parchment paper, place the buns or the dumplings in it, and steam for 12 minutes.
Serve 4 dumplings per person, directly from the steamer, in small bowls. Top with minced scallion. (A dipping sauce should not be needed, but if one is preferred, I would suggest using some teriyaki sauce mixed with some grated ginger.) Alternatively, 1 T of chicken stock may be ladled over the dumplings.

Sunday, January 30, 2011
Chinese New Year
 My first of these posts were going to start on Tuesday when the festival starts, but this was too good not to share right away.
Also my deepest apologies for not posting for a few weeks, the pipes under my sink had exploded after many years of not being happy. So it halted any cooking and thus no pictures to share with my recipes. But crisis is averted!
So here is my Pot Sticker Recipe, I picked it up when doing a search on pot stickers and what filling was normally used. I like using a slew of ideas to help flesh out any recipe I make and then mold it to my own tastes.
Pot Stickers
Ingredients:
Dumpling Dough
- 2 cups all purpose flour
- 1 cup hot water
- 1 head Napa Cabbage [about 4c chopped]
- salt
- 1 pound lean ground pork
- 2-3 finely chopped green onions
- 1 TB white wine
- 1 tsp cornstarch
- 1 tsp sesame oil
- Pepper
- teriyaki [or light soy sauce]
- grated ginger
Preparation:
 Cut the cabbage into thin strips. Mix with 2 teaspoons salt and steam in a hot pan until just wilted, set aside to cool before mixing with pork.
In a large bowl, mix the celery cabbage, pork, green onions, wine, cornstarch, sesame oil, and pepper. It will come together as a rather glutenous looking mass, use your hands for the best mixture to incorporate everything, let sit covered for about 1/2 hr before using.
In a bowl, mix the flour and hot water using the back of a wooden spoon, only using your hands when all of the water is absorbed by the flour [be warned it is very hot, so be gentle!]. Knead the dough on a lightly flour surface about 5 minutes, or until smooth.
Divide the dough in half, wrapping up half of the dough while you work with the other. Roll the dough into a long rope [about 12" in length] and cut into 1/2" circles.
Roll 1 slice of dough into a 3-inch circle and place about 1 tablespoon pork mixture in the center of the circle. Lift up the edges of the circle and pinch 5 pleats up to create a pouch to encase the mixture. Pinch the top together. Repeat with the remaining slices of dough and filling.
Heat a wok or nonstick skillet until very hot. Add 1 tablespoon vegetable oil, tilting the wok to coat the sides. If using a nonstick skillet, add 1/2 tablespoon vegetable oil. Place 12 dumplings in a single layer in the wok and fry 2 minutes, or until the bottoms are golden brown.
Add 1/2 cup water. Cover and cook 6 to 7 minutes, or until the water is absorbed. Repeat with the remaining dumplings.
To make a dipping sauce, in a small bowl, mix the teriyaki with 1 teaspoon of grated ginger. Serve with the dumplings.


NOTE
You can freeze the uncooked dumplings to cook later on, for best results freeze on a baking sheet and then transfer to a freezer bag. This way they will not stick together, and cook right from frozen.
Sunday, January 16, 2011
Have your cake and eat it too!!
So I was looking over my past month and the next few weeks to come and realized there are a lot of birthdays past and upcoming. Including my brother in law, sister and grandmother. And as it is the start of the year I guess I could even say that New Years is the new calendar's birthday! So I was thinking what could be a better recipe to put down for today than a cake one?
 This is one that I got from perhaps one of the best recipe books of all time, it is something that every [especially Canadian] home cooks should have in their kitchen. I actually picked it up when I was seventeen working at my co-op, one of my co-workers saw the book and got all excited, telling me I "HAD" to have this book, as it is one she has had for years and years and years. While I was thinking "yeah right how can this little paperback be the be all and end all...." I know over the years I have turned many times to this book for inspiration and for recipes that aren't normally done anymore in the home kitchen.
The Purity Cook Book
This was first created in 1917 for Purity Flour, and was given out free to customers to help encourage customer loyalty and has been republished, added on to and edited several times over the years for the "new and modern" Canadian home.
The recipe I used for this one is number 88 Chocolate Cake and is on page 42.
Preheat Oven to 325deg
Grease a 9" square pan or two round 8" layer pans, line the bottom with wax[or parchment] paper.
Cream
1/2 c shortening [I usually keep a 1lb block in my freezer]
Gradually blend in
1 c sugar
Beat until light and fluffy
Add
2 well beaten eggs
Beat until well combined
Then blend in
2 squares of unsweetened chocolate, melted [I have this melting over a double boiler while creaming and blending the above]
1/2 t vanilla
Blend or sift together
1 1/2 c all purpose flour
3/4 t baking soda
1/2 t salt
Add to creamed mixture, alternately with
1 c sour milk [now I realize we do not keep "sour" milk in the house... to make this don't leave your milk out until it grows creatures, just add a splash of white vinegar to a cup of milk, let it sit for 10m, while you are doing all the above stuff. And presto you have a yellowish congealed creature also known as "sour milk". I actually learned this trick from one of my best friends and old roomie back in University.]
Blend well after each addition
Pour batter into the prepared pan[s]
Bake in a preheated 325deg oven - 45-50m for square cake and 30-35m for layer cake.
My rule of thumb when finding out the right time for baking cake, is when the knife or tooth pick can penetrate the cake and not come out with goo. So when the cake sticks to itself and not the knife/tooth pick, it is ready. But don't open the oven every 10m to check, wait until your nose can start smelling the cake, give it time to heat up and bake.
To ice this cake, I did my own little creation, or spin on a ganache, cause for some strange reason when I made this I was aiming for chocolate goo!
Melt over a double boiler
2 squares of semi sweet chocolate
1 square of dark chocolate
Add in
1 T of Butter
2 T Milk [or cream]
1 c of Icing Sugar [stir in the icing sugar slowly until you have a stiff but workable chocolate goo]

Let me tell you it was delicious!
Tuesday, January 4, 2011
Pasta Continued...

This is my recipe:
First the sauce:
This is a basic Bolognese [some will use a non meat sauce or a marinara, but I prefer the taste and texture of the meat sauce].
1lb ground meat [I use a pre mix from my butcher of veal, beef and pork]
oragano
basil
bay leaves
garlic
rosemary
onion [diced finely]
tomato paste
tomato sauce
red wine
water
Brown meat in sauce pan along with onions, and spice, add in salt and pepper to taste. When everything is browned, add in your paste and sauce, using the cans add in 1 can measurement of wine and 1 of water, until you have a nice deep red colour.
I let this simmer at a low heat for hours, until the liquid thickens and reduces by about 1/3, stirring every hour or so.
Let the sauce cool right down before use in this dish.
 Cheese Mixture:
2 packages of soft Ricotta [about 1lb]
2 whole eggs
grated parmasan
1/2 - 3/4c spinach [I use the frozen cubes, and let them thaw out and drain]
Mix this all together in a bowl and let sit for min of 1h to overnight for full taste.
aside from the above you will need also about 1lb of sliced mozzarella [don't buy the processed type, as it will not taste as nice as the fresh]
Have your pasta rolled out into sheets, for the recipe on pasta click this link, the thickness of your pasta is whatever you desire, I did at the lvl 4 on my machine.

I then bake this [covered to start] for about 45m at 350 deg, taking off the foil and allowing another 10-15m for the cheese to bubble and brown.
In terms of timing, I trust my nose, and check on the pasta only when I can smell the scent of the dish all over the house. Joy of home cooking and not always noting the time, and getting distracted with one thing or another!
So no worries if you don't get exactly the right amount of time, and for the love of cooking don't use a timer as that can lead to checking on the dish every few mins, which only lets out heat and prolongs the overall cooking time. Timers are only good for eggs and segmenting your day. When it comes to cooking the best timer is your own sense of smell, your nose will tell you when to open that door and check on things.
Once your pasta is done and all molten goodness, allow for the dish to rest 10m before cutting into it. If you cut into the lasagna [or any baked pasta] right on pulling it out, will only result in all of your hard work pouring out of the layers! Let it rest, let the gooey cheesy yumminess settle a bit and you get the below image. a delicious layered slice of Italian goodness!

This recipe is one that is freezable both in its uncooked state [I often make two dishes, one for that night and one for later on which I freeze]. If frozen, cook from that state, placing the covered dish into the cold oven [a VERY important factor to keep from shattering your dishes]. Let your oven preheat with the dish in it, and allow for extra time for baking, again let your nose be your guide as to when to take out the pasta. From frozen it can take up to double the time to get cooked all the way through, but is mightily delish when it comes out of the oven, just like fresh!
Also note, you can make your sauce ahead of time and keep in either the fridge for up to 3 days covered, or in the freezer for up to 3 months [granted I know sauce in my house barely lasts 2 days, but if you can leave it for the 3 days it will develop a far deeper flavour profile]. The cheese you can make up to 2 days in advance, leaving it covered in the fridge, placing the cellophane directly on the surface like a second skin to keep the air out.
Monday, January 3, 2011
Homemade pasta
Well this first post has been a long time coming, I was suggested the idea of starting up a food blog where I share my recipes and photos of food stuffs when I was being "too tempting" with my updates of my creations.
So I created this blog... several months ago, and chickened out, I mean why would anyone want to read about my cooking? Well its a new year and after being asked "where is the blog" here it is, my first recipe and photo sets.
It is my recipe for homemade pasta which is so simple! After you make it once, you will wonder how you ever made do with the store bought.
I actually used this for my lasagna this past Christmas Eve, and I tell you it was truly the best one I had ever had!
With no further ado, the recipe:
 Pasta
Pasta
2c flour
3 large eggs
pinch of salt
cold water
For this recipe the easiest thing to remember is that you need 1c of flour and 1 egg per person with 1 egg as your starting point. So for 4 people it is 4c flour, 5 eggs and so on.
You can use a mix master or mix by hand, make a well in the flour and crack in eggs, mix together with salt, and slowly add in cold water [tap is fine] until the mixture comes together as a sticky dough [you want to be able to pinch it, and it prefers to stick to itself than you].
Wrap the dough in saran/plastic wrap and refrigerate for minimum of 2hrs to let the gluten rest.
Now having a pasta roller/machine makes this step significantly easier and faster, but is not required. Cut your dough into 4 balls and roll through the machine starting at your largest setting and working it down every other roll. Use flour to keep the pasta from sticking to itself by dusting the dough. once rolled out you can cut into desired shape be it flat for lasagna, strips for linguine, or [with the machine] into spaghetti rolling it through the cutter.
This is a delicious pasta that can be cooked right from this state, a quickie recipe is to take strips of pasta [like the scraps from another project] and toss into a pot of salted boiling water. Like dumplings, you know it is ready when the dough floats to the surface. drain the water and toss the hot pasta with pesto, or just some garlic and good olive oil. It is such a treat to have!
If you want to you can save some pasta for later on by drying out the raw dough over a wooded stick [like a spoon handle, or in classic Italian style with a broomstick handle!].
So I created this blog... several months ago, and chickened out, I mean why would anyone want to read about my cooking? Well its a new year and after being asked "where is the blog" here it is, my first recipe and photo sets.
It is my recipe for homemade pasta which is so simple! After you make it once, you will wonder how you ever made do with the store bought.
I actually used this for my lasagna this past Christmas Eve, and I tell you it was truly the best one I had ever had!
With no further ado, the recipe:
 Pasta
Pasta2c flour
3 large eggs
pinch of salt
cold water
For this recipe the easiest thing to remember is that you need 1c of flour and 1 egg per person with 1 egg as your starting point. So for 4 people it is 4c flour, 5 eggs and so on.
You can use a mix master or mix by hand, make a well in the flour and crack in eggs, mix together with salt, and slowly add in cold water [tap is fine] until the mixture comes together as a sticky dough [you want to be able to pinch it, and it prefers to stick to itself than you].
Wrap the dough in saran/plastic wrap and refrigerate for minimum of 2hrs to let the gluten rest.
Now having a pasta roller/machine makes this step significantly easier and faster, but is not required. Cut your dough into 4 balls and roll through the machine starting at your largest setting and working it down every other roll. Use flour to keep the pasta from sticking to itself by dusting the dough. once rolled out you can cut into desired shape be it flat for lasagna, strips for linguine, or [with the machine] into spaghetti rolling it through the cutter.
This is a delicious pasta that can be cooked right from this state, a quickie recipe is to take strips of pasta [like the scraps from another project] and toss into a pot of salted boiling water. Like dumplings, you know it is ready when the dough floats to the surface. drain the water and toss the hot pasta with pesto, or just some garlic and good olive oil. It is such a treat to have!
If you want to you can save some pasta for later on by drying out the raw dough over a wooded stick [like a spoon handle, or in classic Italian style with a broomstick handle!].
Subscribe to:
Posts (Atom)